– Independent advice
– Visual inspection
– Gauging
– Caliper pigging
– Ultrasonic inspection (UT)
– Magnetic Flux Leakage (MFL)
Properly determining the integrity of the pipeline is essential for pipeline owners to avoid problems in the future. Pipelines are designed for a specific purpose and service life. Despite measures, such as cathodic protection and coating, the quality will decrease over time due to, for example, oxidation (corrosion) of the pipe material. In addition, external factors can have a major direct impact on the integrity of the pipeline. Pipelines are laid in a straight line as much as possible at a depth that minimises external risks. However, it can happen that pipelines are damaged by digging or ploughing. To quickly map these risks, TECCURO has various inspection methods available to determine the integrity of your pipeline. TECCURO works together with the best inspection companies in the world and this way we can provide you with independent investigation and inspection advice.
Visual inspection
Visual inspections are perhaps the oldest existing method. The downside of a visual inspection is that this method relies heavily on the eyes of the inspector. Visual inspections, in contrast to the other inspection methods, are quick and cheap and give a good impression of (a part of) the pipeline. Modern techniques make it possible not only to look further into the pipeline, but it will also enable others to give an assessment (second opinion) based on the recorded photo and video material. TECCURO can provide borescopes and powered video cameras to inspect your pipelines. Subsequently we can plan a follow-up with you.
“WE ARE YOUR EYES AND EARS ON AND IN THE GROUND”
Gauging
Before a pipeline is put into operation, it must be checked whether the internal diameter of the pipe is in accordance with the design. It is also important to check the internal pipe diameter before putting special and expensive pigs into a pipeline. A simple and effective method to use, is a gauge pig. A gauge pig is equipped with a calibration plate that has a specific hardness and size (often 90-95% of the internal pipe diameter). If this pig encounters a constriction in the pipeline, the plate will bend. A calibration plate does only tell us that we have a restriction inside the pipeline, it will not indicate where the restriction is. Other inspection techniques are needed to find the location of the restriction.
Caliper pig
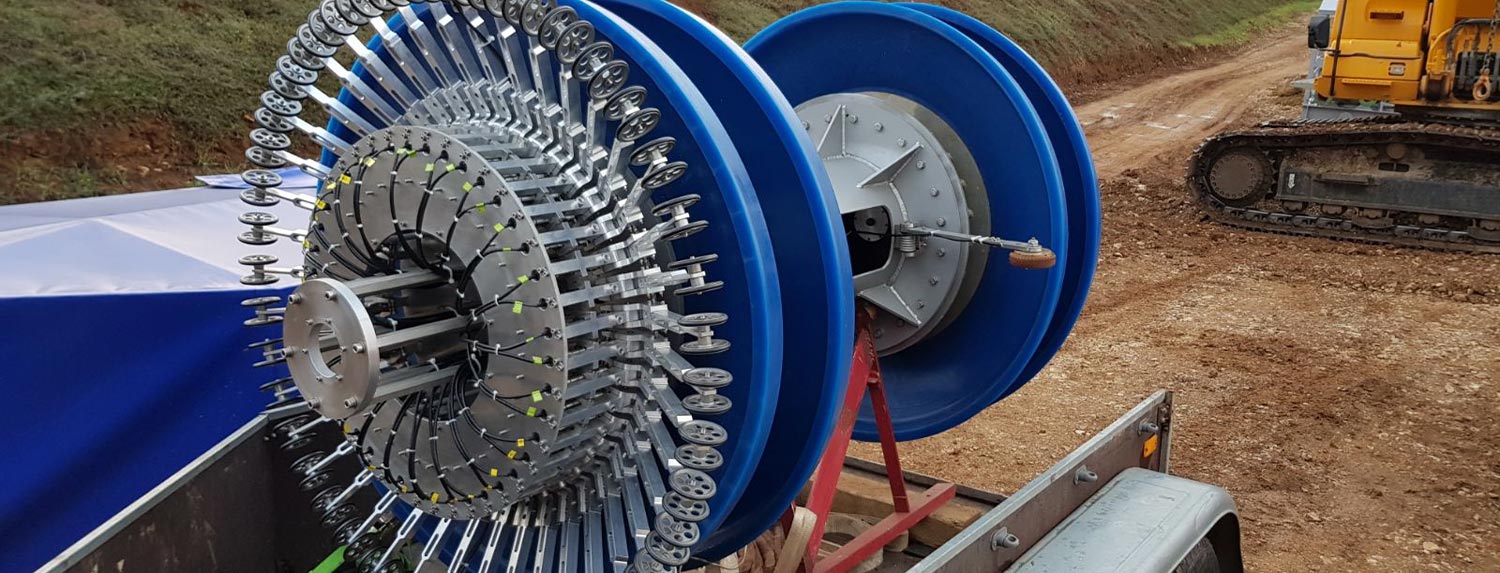
Where a gauge pig gives a rough indication of your pipeline’s internal diameter, a caliper pig will provide much more detailed information. A caliper pig is a pig with “fingers” that run along the pipe wall and can measure dents, ovality, radius and angles of the pipeline. Because a caliper pig also registers the position, the location of the defects can be more easily determined.
In-line inspection pigs
In-line inspection pigs (or Smart pigs) are able to collect a lot of information about the condition of your pipeline. Especially compared to the gauge and caliper pigs, these inspection pigs are completely a different level. These pigs can pick up on even the smallest defects. The data from these inspection runs improves the quality of your assessment and reduce the possible risks (fit for purpose). In-line inspection pigs can measure:
- Decrease of wall thickness;
- Different between internal and external defects ;
- Ovality;
- XYZ-measurements ;
- Specific defects like pitting & cracks .
Despite the fact that the world of intelligent inspection pigs is constantly changing, we can roughly divide the technique into two categories: Magnetic Flux Leakage (MFL) and Ultrasonic Technology (UT). Both methods have their own specific advantages and disadvantages for registering defects. To choose between these inspection techniques we have to look at several factors. TECCURO has sufficient knowledge to determine which technique is best suited for your pipeline project.
Magnetic Flux Leakage (MFL)
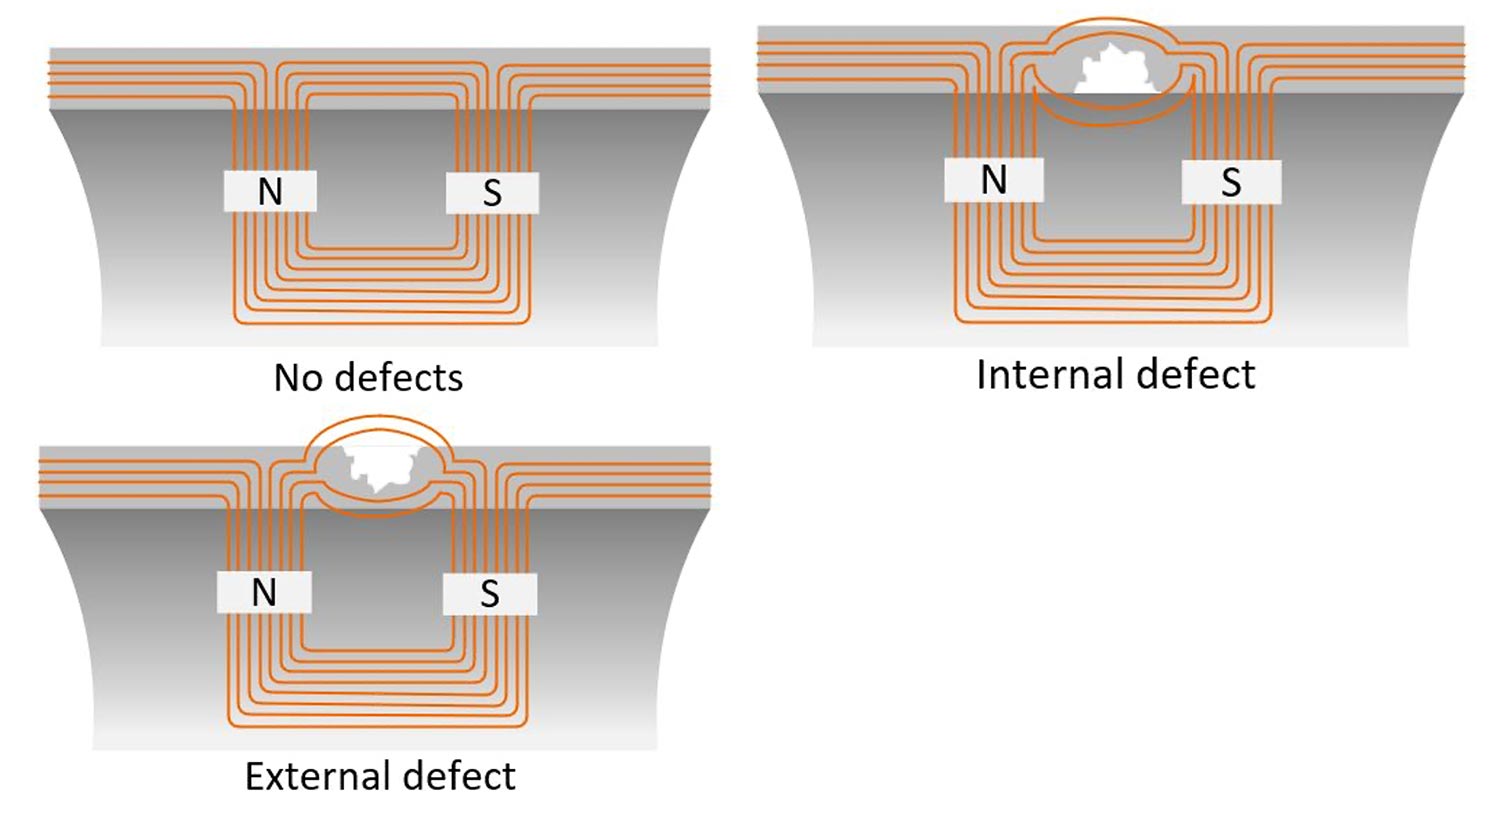
The measuring principle of MFL pigs is based on tracking any disturbances in the magnetic field caused by defects in the pipe wall. This means that the pipeline wall need to be magnetized in order to take a measurement. Steel can be magnetized, plastic cannot. To generate the magnetic field, powerful magnets are used that are positioned close to the pipeline wall. If the pipe wall is not damaged, the magnetic flux will remain intact. As soon as the pig passes a defect, the magnetic flux will bend around the defect and this signal will be registered by the magnetic flux sensors. Eddy current sensors are used to indicate the difference between internal and external corrosion.
Ultrasonic inspection pigs (UT)
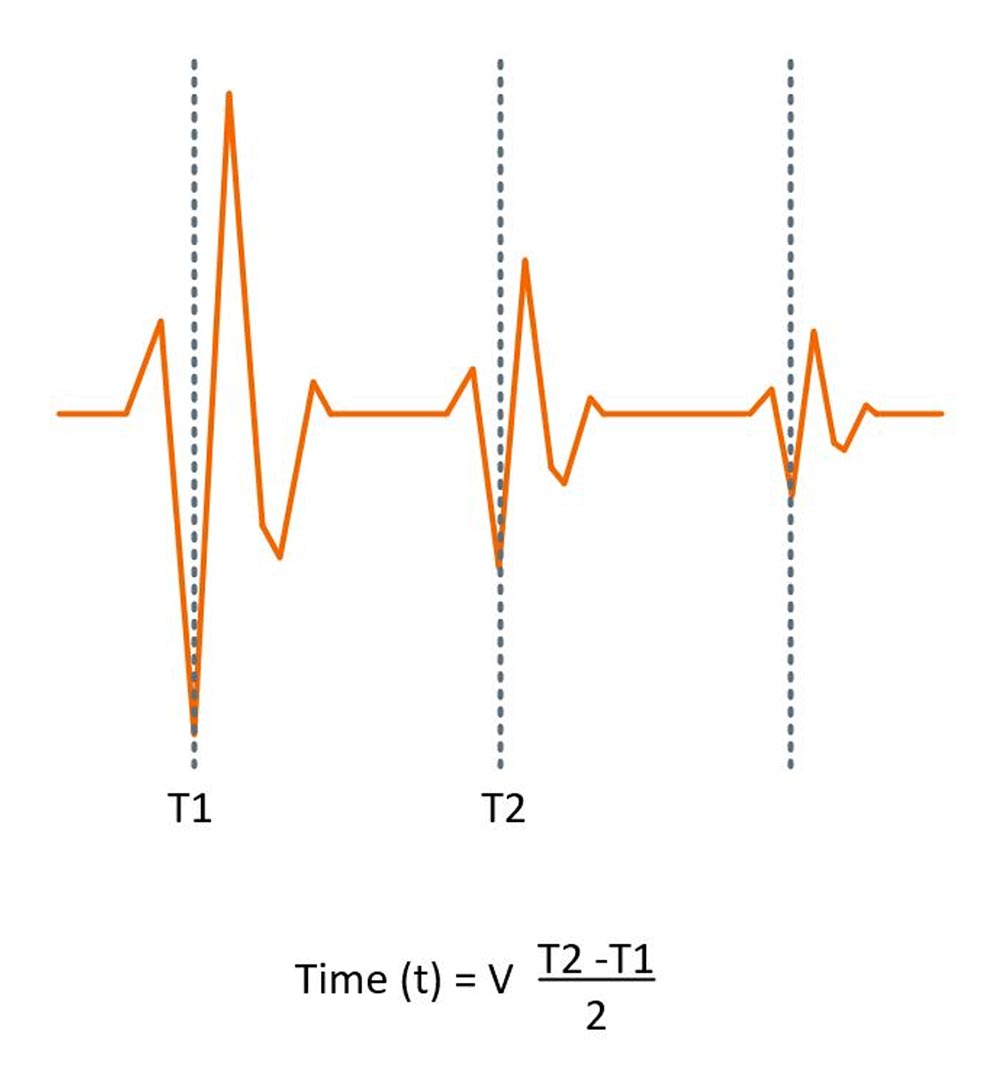
Ultrasonic or UT inspections uses a sound signal, in the sound spectrum of 20kHz to 800Mhz. The sound signal that is sent from the UT tool will reflect on the inner and outer walls. A liquid is needed to transport the sound signal to the wall. The echo of this signal is received via the sensor. Based on the time difference between the first (inner wall) and second (outer wall) echo, the wall thickness of the pipeline can be calculated. In case of defects, the time of the first or second echo will be different and this way it can show immediately whether the wall thickness is decreased on the inside or the outside of the pipeline.
Advantages and limitations
Inspection companies, as mentioned, are continuously seeking for the best inspection method possible. Despite these developments, there are some differences between a MFL and UT inspection. Should you wish to carry out an inspection on your line, TECCURO is available to assist you available to assist you.
| MFL | UT | |
| Suitable for gas pipes | ***** | ** |
| Suitable for liquid pipes | **** | **** |
| Material pipeline | ** | ***** |
| Internal diameter restrictions | ** | **** |
| Wall thickness measuring | *** | ***** |
| Measurement | Quantitative | Qualitative |
| Crack detection | **** | * |
| Internal/external corrosion | **** | **** |
| Measuring speed | **** | * |


